A major event coming up! I am going to the Christmas Masquerade Ball. This is organised by the University of Southampton Steampunk Society called "Kraken Soc." and the theme is "Vintage/Steampunk/diesel-punk". I have never done this before and I am sure as hell this would be fun. But now, I need something for the ball without which it will be completely incomplete… A mask! Well, the Kraken Soc. folks have made sure no one will be without a mask for the D-day… After all it is a one of kind event :D So, they organised a mask making workshop for everyone who was interested and wanted to wear their own custom made mask to the Ball… Ain't that cool now!
The workshop was a big success! Many had come with their own raw materials like laces, glitters, hot glue guns, feathers, stick-ons, felt sheets, loads of paints, and even a big roll of real leather!! Very dedicated people I must say… I like that! I ended up making not just one but 2 masks in three hours of DIY session, made new friends and watched Brian Blessed's repetitive "Dive" dialogue in arctic set up playing in the background… And it all only costed £1, contributed towards the Ball.
Anyway, coming to the masks I made, I will only concentrate on the tutorial of the one that I wore for the Ball but I will show you the 2nd one too. So, here we go…
All you will need:
1.) A thick golden card paper
2.) Steampunk gears and small watch parts
3.) Golden/bronze glitter glue tube
4.) A sharpie
5.) Hot glue gun
6.) A mask template
I started with a simple template for a mask like this one

And traced it out on a golden card with a pen. The card paper has to be thick enough to be sturdy but not too hard.


I am actually very happy with the outcome:


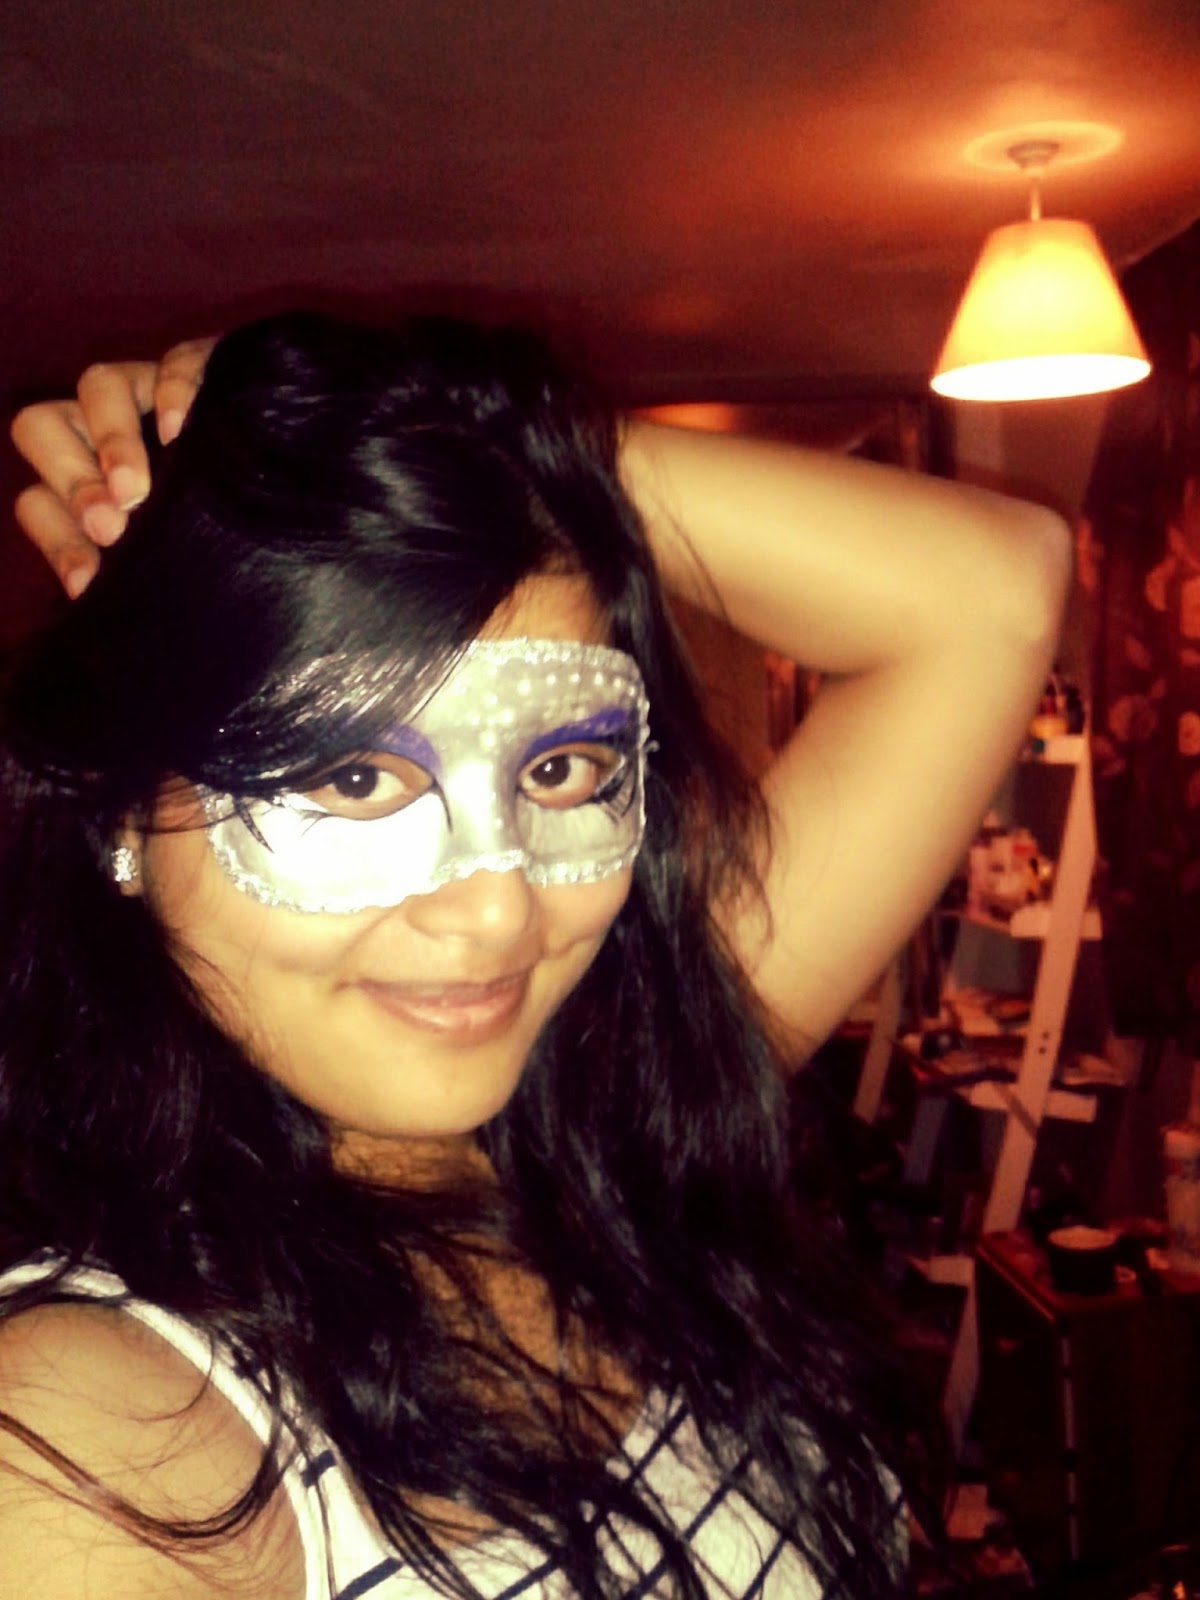
Here is the second one:

For this one, I was given a white plastic mask to work on by the soc. so it wasn't really starting from scratch. I decorated this one just using a sharpie, some purple paint, blue glitter nail paint, silver paint, silver ribbons, and pearl stick-ons.
There is not much to tell about it, all I did is use some silver paint as base all over the mask, and then use silver trimmings for the edge of the mask. Once the paint was dry, I used some faux pearl stick-ons that was brought there to the workshop by the soc. members and decorated the brows, the forehead and the nose bridge. Then I used some purple paint as eye shadow around the eyes, and added some blue glitter nail-polish at the outer corner of the eye just for some design and texture. And then I finally finished it off with a black sharpie, drawing out details of the eyes.
And that's it:

 |
Anyway, coming to the masks I made, I will only concentrate on the tutorial of the one that I wore for the Ball but I will show you the 2nd one too. So, here we go…
All you will need:
1.) A thick golden card paper
2.) Steampunk gears and small watch parts
3.) Golden/bronze glitter glue tube
4.) A sharpie
5.) Hot glue gun
6.) A mask template
I started with a simple template for a mask like this one
And traced it out on a golden card with a pen. The card paper has to be thick enough to be sturdy but not too hard.
Once cut out, I thought may be I should give it a slightly different shape than the plain ones. So I gave it a bit of details of my own. This is the shape that I ended up with:
Once done I used a glue gun to put some glue all over like a squiggly art, not too specific, just giving a texture to the mask and let it dry. As most of you know that it hardly takes any time for hot glue to dry, I could move on to the next step fairly quickly. But that meant I had to stick things to the mask very quickly too.
I used golden glitter glue stick to smear the glitter all over the mask to give it a texture and the required vintage look.

Next, I used sharpie to put little details around the eye and also stuck on some watch/clock gears and parts on the corners of the mask. And....
VOILA!
 |
| Mask all done! |
However, I had no idea how to put it on as I hadn't put any thread holes on it, and even if I did it was too uncomfortable to wear. So I left it for a while, before I saw the solution right in my kitchen… Skewers!!!
 |
| Skewer sticks in my kitchen |
Why not go for a hand held mask? No one said that's not allowed lol… So, I taped and glued the skewer stick to the side of the mask and I am all set for the Ball now :D
Here is the second one:
For this one, I was given a white plastic mask to work on by the soc. so it wasn't really starting from scratch. I decorated this one just using a sharpie, some purple paint, blue glitter nail paint, silver paint, silver ribbons, and pearl stick-ons.
There is not much to tell about it, all I did is use some silver paint as base all over the mask, and then use silver trimmings for the edge of the mask. Once the paint was dry, I used some faux pearl stick-ons that was brought there to the workshop by the soc. members and decorated the brows, the forehead and the nose bridge. Then I used some purple paint as eye shadow around the eyes, and added some blue glitter nail-polish at the outer corner of the eye just for some design and texture. And then I finally finished it off with a black sharpie, drawing out details of the eyes.
And that's it:
Simple!!!
I hope you liked this post. Sorry if I rushed it through… I am still learning the ways of writing a good, detailed blog. Next time I will try to make it more detailed, explaining the step-by-step process with pictures.
Until next time…
Stay
fabulous
Comments
Post a Comment