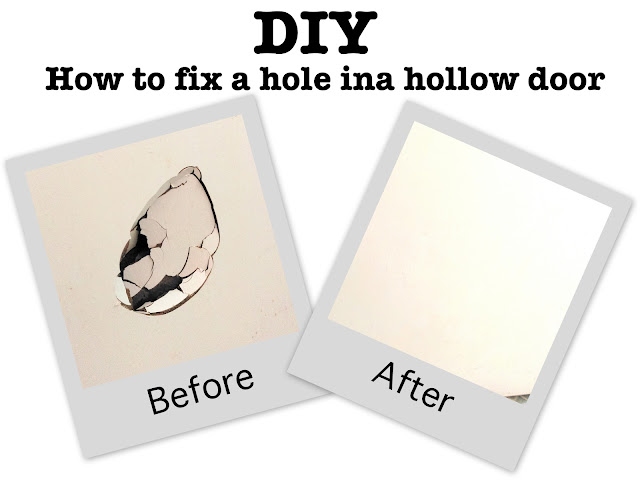
Ever had a hole appear on your hollow wooden doors for whatever reasons? Especially when there is a population of young testosterone filled men in the household... Not to say women can't do it as well, as a matter of fact here's a confession, that hole is my doing, but not because I wanted to punch (or kick in this matter) a hole on my bathroom door, but I was just so agitated I didn't know where I was going and I just happened to kick open the door too hard... Not a proud moment, but it was an accident. Let's face it, we all get those days we just explode, right? No? Must be just me then ...
Well, rage is never good, and I know it too. And so, I was REALLY guilt ridden as soon as it happened. I mean, I didn't mean to kick a hole into my door but I still vented it out in the first place... Plus it's not even my own home (...shit!!!!). Anyway, here's a step-by-step DIY to fix a hole in a hollow doors that I learned while frantically trying to amend the mess I made.
Here's what I found from wikihow "How to Repair a Damage Hollow Core Door". So, I bought these tools from Asda and ebay to fix the door:
Tools:
1. A spackle knife
2. "Fix and Fill" Expandable foam
3. "Polyfilla" Woodflex cement
4. A utility knife
5. Sand paper
6. Some tissue or wipes
7. Matching off-white paint
8. A paint brush
9. A small saw (optional)
Steps:
1. First step required cleaning the hole. I removed the chipped parts, splinters and any loose ply pieces. I also used the utility knife to cut away the parts to have a clean hole. This is necessary to have a smooth finish. Then I wiped it clean with wet wipes.
2. Next, I used the expandable foam to fill in the hole. Be very careful while using this product since it is extremely sticky and a bugger to get rid off especially from skin and clothes. If you get them on your hands, they will be horrendously sticky that no amount of soap can remove, alcohol may help. Also, cover the floor first so that it does not fall on it as it expands. But if you do get it on the floor wait till it expands and dries out completely, then it can be scrapped clean very easily. Once filled, let it sit overnight.
3. Once dry, I cut out the excess foam the next day and sanded any extra foam around the hole area. I also cut out some foam from the hole to make it at least a millimeter or 2 deep for the cement to fill. You can do that in steps with appropriate tools. I used a big bread knife (due to lack of any other tools) to cut the foam first, and then the utility knife to make the job cleaner.
4. Now to fill it with cement, using the spackle knife and the wood cement I filled in the area and smoothen it out with the knife. Then I let it dry for 2-3 hours. This can be done in more than one step since sometimes after drying it may seen that you may need more cement, or if the hole is too deep. The woodflex cement can generally fill up to 10 cm deep hole.
5. Next, I sanded the entire area with a piece of sand paper to smoothen the cement flat so that it would not look rough and uneven.
6. Finally, I painted the area with my off-white paint. I used the colour "duck down" white to paint over the door.
And that's it!

And there you have it, easy ways to repair a damaged door :)
Now, if you ever have a fit or have children or pets that may damage your hollow doors, you know what to do!


Comments
Post a Comment